How to make buttons for schoology on the homepage of your course
It doesn’t take much at all to create these buttons but it’s not super intuitive. I had to search around the internet to learn how to do this when I first got started.
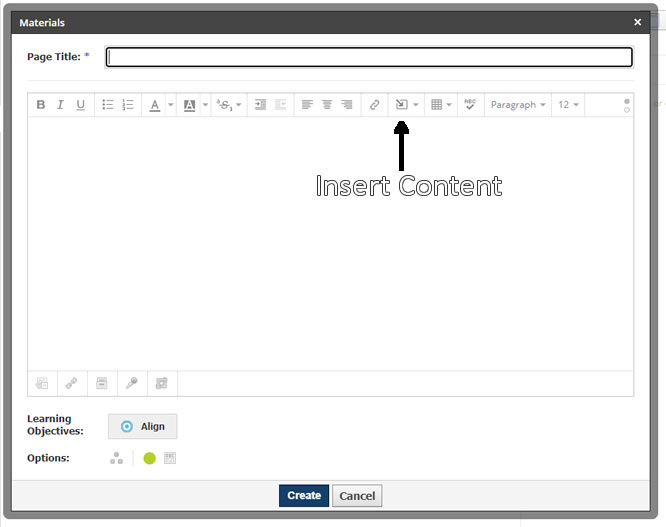
Step 1: Click Add Materials Then Click Page
Step 2: Give your page a title
Step 3 Insert Content and Pick an Image

Step 4: Press Attach File, Find and Select Your Image, and Press Open
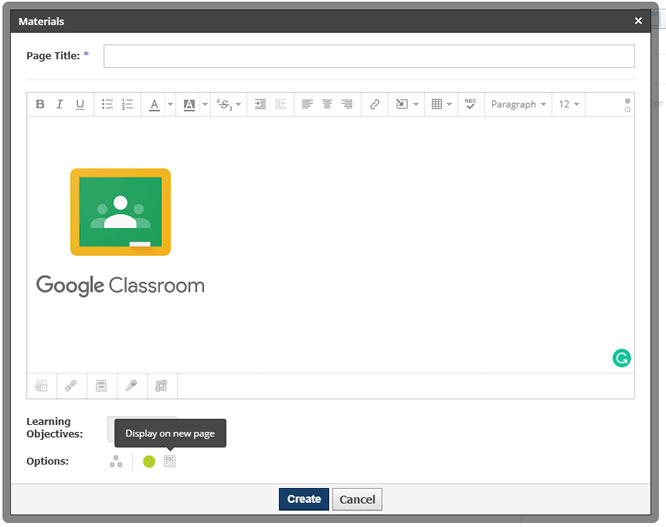
You now have an image on the page
Step 5: Click the Image, then Click the Link Button. Insert a link
Step 6: Press Display on New Page and Press Create

Congratulations you are done.
Many of the tutorials on how to create these buttons use Google Docs and get really involved. I even know teachers who have bought premade buttons, and banners with directions on how to add them to Schoology from TeachersPayTeachers.com.
When I was first trying to figure out how to do this it was a bit intimidating. If I want to make nice for a banner image. I go use Canva.com. If you search for Google Classroom Header, they have some nice-looking headers you can use or I might find an image I like from a site like photostock.com or Unsplash.com and upload the image to Canva.com.
To make clickable buttons I go to Canva.com and Press the button that says, “Custom size”, then I put in a size usually width of 150px and height of 150px, and press create design. I keep the background color the same as the page color is in Schoology so it blends in. Next, I go to elements select the shape I want, style it, and download it to my computer as a .jpg or .png. Finally, I go through the steps above to add the button to Schoology.

